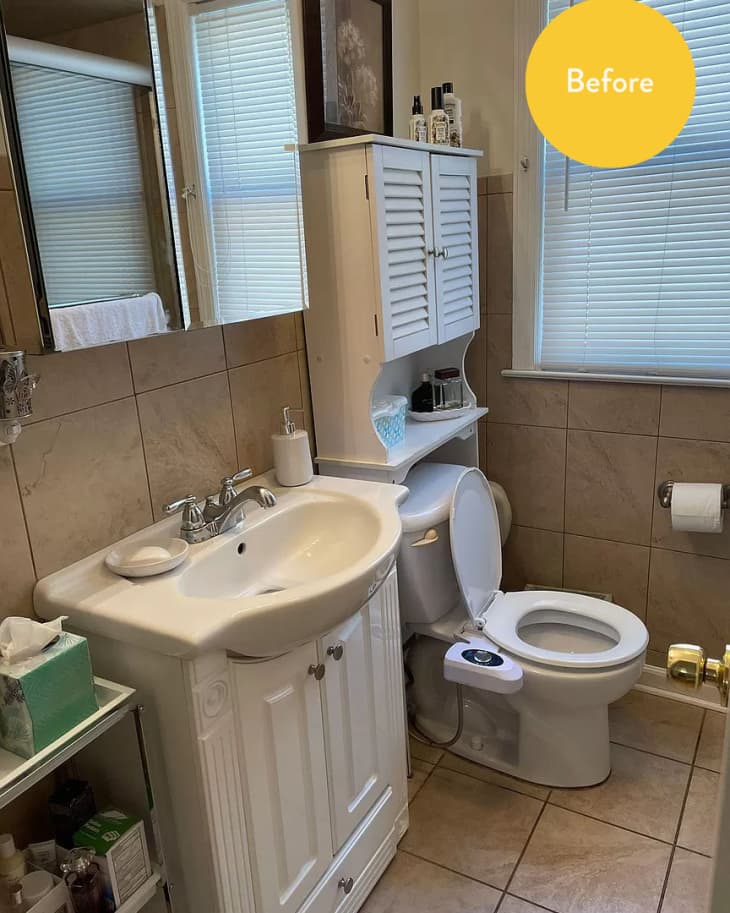
Before & After: A Rental Bathroom Goes from Bland to Brilliant with a Huge Cost-Saving Hack

This piece was created for Cubby, our weekly newsletter for families at home. Want more? Sign up here for a weekly splash of fun and good ideas for families with kids. Join us over on Instagram for more!
Cubby. Real solutions for unreal times.
Join us for a weekly dose of fresh, modern ideas for life at home with your kids.
The older I get, the more in-tune I am with my style. When I find something I like, I really like it — as in, you’re gonna have to pry it out of my hands. So when we packed up our old apartment last summer and took the wallpaper down in our newly renovated dining room, I rolled it up and saved it. My husband thought I was being extra (as per usual) but went along with it, making me promise I would use it or lose it once we moved into the new house. I accepted the deal, and appreciated him looking out for my hoarding tendencies!
Yes, you really can reuse wallpaper.
My precious Chinoiserie Canary wallpaper was removable, and came off our walls so beautifully it felt like a crime to crumple it up and throw it away. So I rolled up each panel as it came down and wrapped it carefully in tissue paper. I initially thought I’d use the wallpaper to wrap Christmas presents, or for a craft, but again, the thought of it being crumpled and tossed out after Christmas broke my heart! Then, one gloomy winter day as I walked into our bathroom, our greige, tiny, sad little bathroom, an idea struck: I’d reuse the paper how it was intended to be used, as wallpaper that could cover up that bummer tile.
I wasn’t sure how exactly it would look over the grooves of my tiles. I’d attempted to use peel-and-stick over tile before, and all the grout grooves just popped right through the thin paper. Because this wallpaper was so thick, I had high hopes. I’d had really good luck before when using liquid starch to wallpaper my wall with fabric, so I tried that first. It worked amazingly well, and was really easy to remove, which was necessary for us as renters.
How to Reuse Peel-and-Stick Wallpaper
I had quite a few 7’ panels of wallpaper that were uncut, but was able to save them and use smaller pieces, because the tile didn’t run the full length of the wall. (The white walls on top of the canary wallpaper added a nice contrast, and kept the color scheme from looking too loud.)
I’ve had my reused wallpaper up for close to a month now, and am so happy with it. I was worried about what would happen with the humidity in the bathroom, but it doesn’t seem to affect it much at all. I have had parts of the wallpaper pop loose, but I believe it was because I was getting too conservative with the liquid starch when I’d originally hung the paper. To fix it, all I did was paint more of the liquid starch on the tile where the paper had come loose, and added a bit of starch to the back of the paper as well. Always make sure your bathrooms are well ventilated with a fan or open window to counteract natural bathroom moisture.
For high-use, damp areas, install some backsplash.
I knew the paper wouldn’t hold up around the sink, so we would need a backsplash in that area. I used a small amount of mosaic tile we had leftover from a previous house project, and glued it to plywood attached to the wall with 3M strips. The plywood ensures that I can remove things easily, because, again, this is a rental! To create the backsplash, I measured the space under the medicine cabinet and cut a piece of plywood to fit. Then, I tiled the backsplash with 4×4 white tile, and let it sit overnight to dry.
Fully customize your grout color, too.
Because the tile was white, I decided to kick things up a bit (more is more!) and added pink RIT dye to my grout. You can find pre-made colored grout, but it was so much more fun to create the exact color I wanted — and I’m always down for a bargain — so spending $4.99 on a bottle of RIT to create a totally custom color was thrilling! To make the colored grout, I mixed dye from a bottle of liquid fuchsia with non-sanded powdered grout in arctic white until I reached a peanut butter consistency, and the color I wanted. After the grout was dry, I attached the makeshift backsplash to the wall with a bunch of heavy duty 3M strips.
Spray-painting outlets? It can be done!
When it came to fixtures I added a pop of color to the outlets with pink spray paint. I wasn’t worried about this being a permanent thing, because outlet covers are cheap and easy to replace. I did, however, have a vision for the bathroom that wasn’t super thrifty, but I figured since I’d saved hundreds by reusing old wallpaper, it was well worth it. I’m talking about the coveted pink toilet paper holder by NewMade LA that you’ve probably seen all over Instagram and Pinterest. Since the bathroom is so tiny, you see it right when you walk in, and I think it’s just the brightest little touch.
In total, my bathroom makeover cost me well under $100, and as far as I’m concerned, it’s the best under $100 I’ve ever spent! Yellow and pink are some of the happiest colors I can think of, and I love that our bathroom has gone from bland and sad to warm and happy — for next to nothing!