
We Asked 2 Chefs to Share How to Make the Best Pot Roast, and They Had the Same Piece of Simple Advice
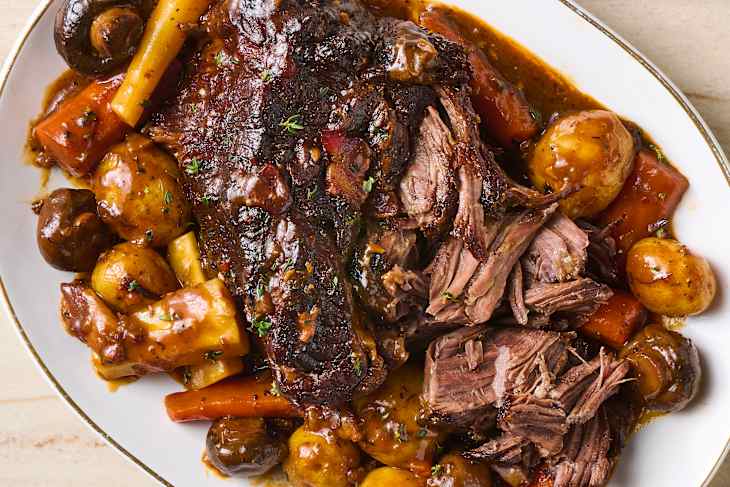
Pot roast feels like one of those wholesome, cozy dishes that every household has a recipe for. I know that in our constant search for convenience and shortcuts, the temptation is high to just throw a beef chuck roast into a slow cooker or Instant Pot with a bunch of vegetables and stock and then go about your day. I get it! We’re all busy and have a lot on our plates — literally and figuratively. But if you just take 15 minutes or so to do one crucial step first, your pot roast will be so much more flavorful.
I spoke to two professional chefs about the trick to making a delicious pot roast, and they both said the same thing: You have to sear the meat first.

The Best Way to Make Pot Roast, According to Chefs
“Searing is essential,” says Katie Button, chef and co-founder of Cúrate, a Spanish restaurant in Asheville, North Carolina. She likes to sear the meat first, then set it aside and sear the vegetables as well. “Taking the time to brown both the meat and the vegetables is what will build the most flavor in the finished roast.” Her upcoming cookbook, Spanish Accent, gave her reason to test a lot of different pot roast recipes — and she tells me that searing the meat is a big part of what makes the best pot roast.
Chef at Strange Delight in Brooklyn and author of Hello, Home Cooking, Ham El-Waylly takes the searing process a step further. For the best results, he says to “season your meat aggressively on all sides and then let it rest overnight on a rack in the fridge.”
This additional step, while not mandatory, is helpful for a couple of reasons. First, it allows the seasoning to penetrate the meat more deeply. Second, it helps dry out the surface of the meat, which will help the Maillard reaction (this is when proteins sear and turn golden-brown and crusty) happen faster. If meat is wet when you put it into a skillet, the skillet has to expend energy boiling off that liquid before it can actually sear the meat. Until the water is completely evaporated, the meat will cook, but it won’t brown — this is why many recipes ask you to pat meat dry (or do what El-Waylly says and let it rest in the fridge after seasoning) before you cook it.
After the overnight rest, El-Waylly says to “make sure you sear your meat on all sides — this is the foundation of your flavor.” Like Button, El-Waylly’s upcoming cookbook also has a recipe for pot roast, so this advice comes from many trials and tests. Speaking from my own experience as a cookbook author and former chef who, incidentally, also has a pot roast recipe in an upcoming cookbook, I know that searing the meat first is really one of the best things you can do for your pot roast.
Tips for Searing Your Roast
- Timing is everything. Really give your meat a good sear on all sides. Medium-high heat for about 5 minutes on each side should be plenty of time — especially if you rested the meat in the fridge overnight like El-Waylly advises.
- Simple is best. “Don’t get fancy,” El-Waylly tells me. “You don’t want a fatty thing like a short rib. This is chill eating, go with something like a chuck roast.”
- Use the fond. These are the crusty bits that stick to the bottom of your pot or Dutch oven during the searing process. “Don’t you dare waste the fond,” El-Waylly says. After you finish searing everything, deglaze the pan with some wine or stock. “That adds a bunch of flavor to your sauce.”
- Rest your meat. Both Button and El-Waylly rest their pot roasts after cooking. “Before cutting into the pot roast make sure to let it rest so all the moisture redistributes and your pot roast eats more succulent,” he says.
- Thicken your sauce. While your meat rests, take a tip from Button and use that time to thicken your sauce. “I will strain the braising liquid off the meat and vegetables and reduce it until thickened and then pour it back over the meat and veggies,” she says. “Thickening the sauce gives it the texture that it needs to cling to the meat and vegetables in a really pleasing way.” This has the added benefit of further concentrating the flavor you started building when you seared the meat.
This post originally appeared on The Kitchn. See it there: We Asked 2 Chefs to Share How to Make the Best Pot Roast, and They Had the Same Piece of Simple Advice