
I Tested 7 Methods for Shaping Burger Patties, and the Winning Method Makes Them Perfectly Juicy
One of my early food memories was asking my dad if I could help flip the burgers he was grilling on our back porch. I loved the aroma and sizzle of the meat more than the taste — he could have used some tips for grilling juicy burgers — but, hey, that’s what burger toppings are for! He focused more on how long to grill burgers and totally overlooked the importance of shaping the patties.
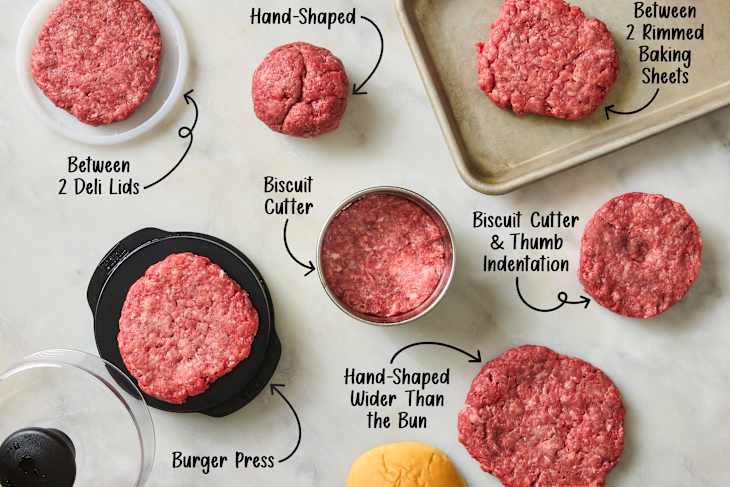
How you shape a burger patty has a huge impact on the texture and juiciness of the cooked burger. Searching online shows countless ways to make the best patty, with each claiming superiority. It was time to see how these methods held up to the fire (my grill fire, that is). I settled on seven different, popular methods to test side by side. After an afternoon at my charcoal grill, I found the winning method. I couldn’t believe the key to success was in my kitchen the whole time.
So, What’s the Best Way to Shape a Burger Patty?
A Few Notes on Methodology
- The ground beef: To ensure a fair test, I shaped and grilled all the patties on the same day, using 80/20 freshly ground beef purchased at my local grocery store. I weighed 1/4-pound portions of meat and kept them cold until it was time to shape. Each patty was seasoned simply with salt and pepper on both sides before grilling.
- The testing: I prepared my charcoal kettle grill for direct cooking over medium-high heat (400°F to 425°F) using a charcoal chimney and hardwood briquettes. The grill grates were preheated for about 15 minutes, then I cleaned and oiled them. I cooked the burgers to medium, using an instant-read thermometer as well as our guide for how long to grill burgers, which was a speedy two to three minutes per side. I flipped them once, let them rest for about five minutes, and tasted them hot, sampling both the edges and center of each patty.
- Ratings: I judged each method on a scale of 1 to 10, with 10 representing a tender, juicy burger that was sturdy enough to withstand grilling with an even shape and height. I considered the ease of shaping, and if a special tool was used I considered whether it was beneficial enough to warrant buying something extra.
Why You Should Trust Me
As a culinary school graduate, former line cook (where I manned the grill station), and recipe developer with over 15 years of experience contributing to national print and digital outlets, I’ve shaped and cooked more burgers than I can count. I’ve smashed, stuffed, and stacked burgers, from thin craggy ones to impressively thick patties that require unhinging your jaw and plenty of napkins. It’s given me insight to fully appreciate the difference between a well-cooked, juicy burger and a heavy, hockey-puck-like disk.
Method #1: Between 2 Rimmed Baking Sheets
- Rating: 3/10
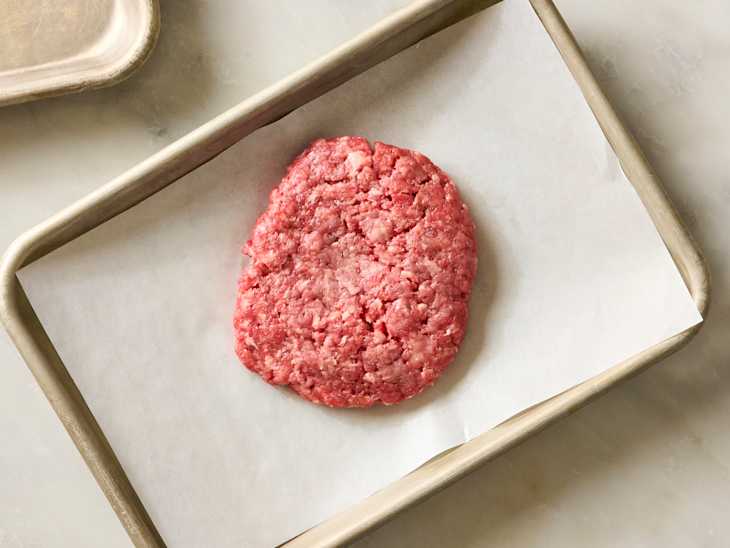
About this method: We were intrigued by this burger-shaping video, which seemed incredibly simple and required only two baking sheets of the same size. Essentially, you lightly wet the top of one baking sheet and the bottom of a second with water (to prevent the meat from sticking), and press a ball of ground beef between them. I pressed a single patty, but the video showed that you can press multiple at once, shaving a good chunk of time off your burger prep.
Results: I was pretty let down by this method, and my results didn’t match the video. I realized as I was following the method that you can’t actually see the patty as it flattens, so I didn’t know when to stop pressing. On the plus side, the meat didn’t stick to the moistened surface. However, it also wasn’t circular and had ragged edges, like a smash burger. It was about 4 1/2-inches in diameter, slightly larger than my buns, so the size ended up fine. But the patty was fragile and difficult to lift off the sheet in one piece.
I was able to get it onto the grill intact, but one of the craggy edges broke off when I flipped it and nearly fell between the grill grates. Despite that, the burger was actually very tasty. Even though it was smashed, the meat wasn’t dense or tough, and I appreciated the wider surface area and all the extra charred flavor that it allowed. But I can’t recommend this method for grilled burgers because ultimately, they weren’t sturdy enough. If you do decide to try this method, I would carefully shape the meat into a round ball and press gently to yield thicker burgers. And don’t forget to thoroughly scrub the bottom of your baking sheets!
Method #2: Burger Press
- Rating: 4/10
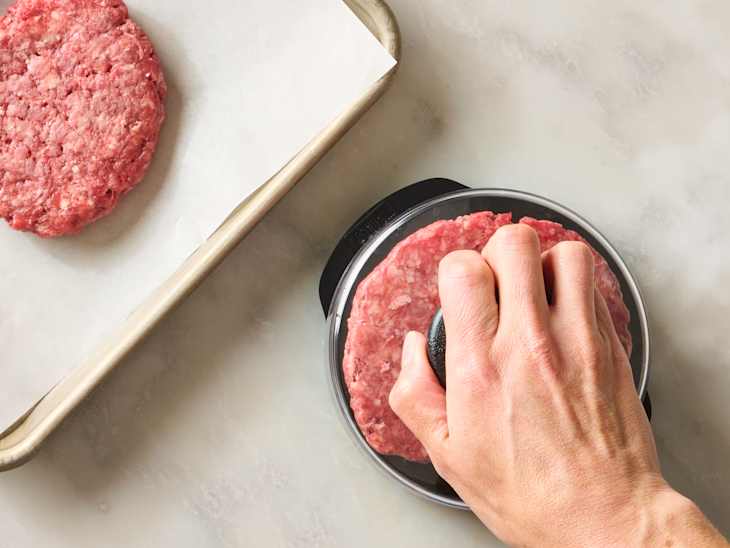
About this method: There are many burger presses you can buy that seemingly do the shaping for you. We tried this one from Weber, because we were grilling the burgers and Weber knows grills. There were no instructions in the box, but there is a brief video on the product page. The press consists of a lid (that reminded me of a straight-sided cake plate topper) and a flat surface with one side for shaping 1/4-pound patties and one for 1/2-pound patties. You pack the meat into the lid and press it against the appropriate side to flatten it into an even, round patty. The handle on the lid leaves behind a slight indentation, theoretically resulting in a level, cooked patty. The video showed the lid lifting off cleanly, leaving behind a round patty on the base. But reviews mentioned this often did not actually happen.
Results: In this case, the reviewers were correct. I added the beef to the lid and pressed against the 1/4-pound-marked side. Even after pressing as far as I could go, the meat didn’t quite reach the edges. I lifted up and discovered the patty was firmly bonded inside the lid. With a firm downward swing, the patty dropped onto my awaiting baking sheet and nearly cracked in half. I pressed the seams together and proceeded.
The meat held together as it cooked, although the round shape became almost an oval, and the crack I tried to patch was still visible. The burger tasted no different than the ones shaped by hand, although it looked much more misshapen. I truly struggled to justify why anyone would need such a specific one-use tool. Did I mention it’s too tall to fit in a standard drawer? If you do end up with one, I recommend either lining the lid with parchment (a Weber-approved suggestion I read in the comments) or brushing it lightly with oil, so the meat releases without breaking. This ranked low because the extra cost and work just weren’t worth the end result.

Method #3: Biscuit Cutter and Thumb Indentation
- Rating: 5/10
About this method: This method is a spin-off of what turned out to be the winning method. You press the meat inside a round cookie or biscuit cutter about the same size as your bun to form a circular patty. Then, use your thumb to make an indentation in the center. As a burger cooks, it shrinks and puffs, due to water evaporation, fat rendering, and tightening of proteins, so making the center slightly thinner offsets the puff and yields a flat, cooked burger. That’s the theory, anyway, but we decided to put it to the test side-by-side with a patty without the indentation to see if it truly makes a difference.
Results: Adding a thumb indentation is easy to do, so that didn’t knock any points off the rating, but the meat did not puff enough to yield a flat burger. I ended up with an unevenly cooked burger that was well-done in the thin center and medium around the edges. However, the burger was still very tender because this method doesn’t heavily work the meat. This method ended up in the middle of the pack because the indentation doesn’t ruin the burger, but it creates unnecessary work that makes an amazing method less successful.
Method #4 Shaped Between Two Deli Lids
- Rating: 6/10
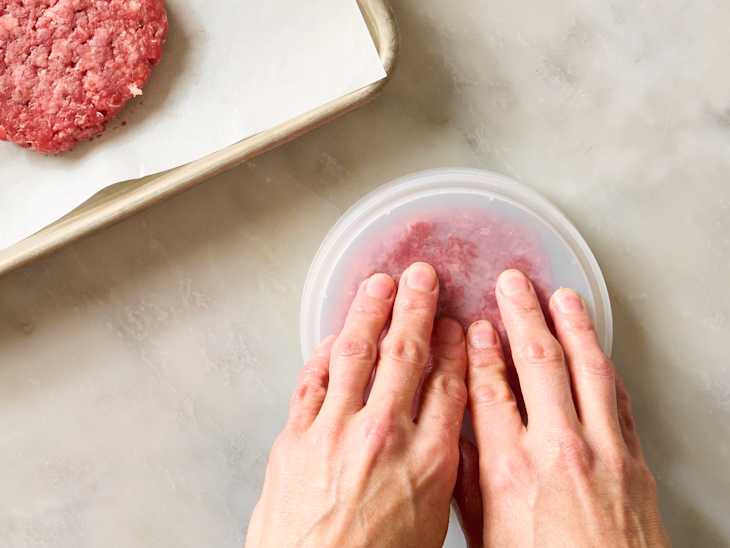
About this method: This method is one we have praised for its ease and ability to create uniform patties of the same width and height. The idea is that you take two plastic deli lids, about 4 inches in diameter with a 1/4-inch depth, place the meat between them, and then press the lids together until the meat fills the center in a perfect round. Lift one lid, and you have a beautiful patty.
Results: The patty was beautiful. It had clean edges and a fantastic round shape. But it took more work than expected to get it there. My initial few presses spread the meat, but not all the way to the edges. To get rid of the bumpy edges, I had to work my way around the two lids with my fingertips, pressing and spreading the meat in different spots until it filled the space.
Once grilled, the burger was beautifully level and round. It looked just like an iconic burger! But the texture of the meat was noticeably tougher and denser than ideal, likely from the extra time and pressure it took to get it to fit into the lid. I can see this method appealing to someone who doesn’t like to touch raw meat or who only needs to shape a few patties (it wasn’t a particularly quick method, either). But on the other hand, you might not even have two matching, non-warped deli lids — especially if you are like me and trying to cut down on the plastic in your kitchen. This method rose above several others because it does create even, round patties that cook well, but there are still better options.

Method #5 Hand-Shaped
- Rating: 7/10
About this method: We felt it was important to include one of the simplest, most common methods for shaping a burger patty: Gather ground beef into a ball and flatten it with your hand and fingers. I like to flatten it against a plate or work surface and then lightly pinch the edges together for a rustic-yet-functional patty. This is usually what I do at home, as it takes minutes, and my hungry family doesn’t like to wait for dinner. I used the size of my bun as a guide for how big to make the patties so they ended up about 4 inches wide and 1/4-inch thick.
Results: This burger puffed in the center more than other methods, and when I cut into it, I could see a pocket of air right under the rounded top. Because it was just flattened with the strength of my fingers, it wasn’t heavily packed, and you could tell by the light texture and juicy meat. It tasted and looked like a classic grilled burger — delicious. Having a rounded center isn’t that big of a deal, as long as the meat is evenly cooked, which it was. But the one big drawback to this method, which knocked it down the list a bit, is that the result has a lot to do with the skill of the shaper. I make burgers almost every week, so I know how to give it a light enough touch to flatten it evenly. If burger shaping is new to you, you might have a few ovals or patties with cracked edges before you get the hang of it.

Method #6 Hand-Shaped Wider Than the Bun
- Rating: 8/10
About this method: Similar to shaping the meat into a ball and flattening it, this method needs nothing more than your hands, a work surface, and maybe a ruler. I flattened the meat with the palm of my hand and then used my fingers to press and shape it into a circle about 1/2 inch wider than my bun. I did my best to keep the top of the patty even without working the meat into a paste.
Results: The burger shrank a bit, fitting perfectly on my bun, but it didn’t puff in the center the same way the regular hand-flattened patty did, perhaps because it was thinner and cooked faster. It had a bigger crust-to-interior ratio from being a larger patty, which I find extra-tasty on a grilled burger. The meat was soft and tender, which contrasted wonderfully with the browned, slightly crisp edges. Again, shaping by hand takes some practice, but this earned its high rating because it’s a simple technique that produces an evenly cooked, delicious burger. This would be a great choice for someone who likes smash burgers because even though it wasn’t quite as thin as that, the extra surface area allows for that deep, caramelized exterior that makes them so spectacular.

Method #7 Biscuit Cutter
- Rating: 10/10
About this method: The idea here is very simple: Press the meat inside a round biscuit or cookie cutter about the same diameter as your bun until it’s an even circle, lift the cutter, and grill away. Using round cutters to shape food is nothing new to me. When I worked as a line cook, we often pulled one out to make perfect rounds of tartare for appetizers or build stacked desserts. This method seemed easy enough, but I wasn’t sure if it was going to be any different than shaping by hand, and I had hesitation about whether or not I’d end up with a lopsided patty because you can’t judge the height until the cutter is removed.
Results: This method surpassed my expectations. Not only did it take seconds to press the meat inside the cutter (I used a 4-inch round) until it was filled and even, but it also looked nearly perfect once it was un-molded. The cutter lifted off easily, without needing water or oil, leaving a well-defined rim. The meat was pretty level, and it was easy to lift onto the grill and flip — no major cracks in sight. I appreciated that I didn’t need a ruler to know when to stop pressing, and washing the cutter was a piece of cake.
This was the best-tasting burger by far. The meat wasn’t compressed, so it had a lighter texture than many of the other techniques. I didn’t realize until I tasted this burger that a looser knitting of the ground meat is what makes all the difference. It was the same meat and seasoning as the other burgers, but it somehow tasted more beefy and well-seasoned. It’s true that you need to use a tool, but as an inexpensive, multi-purpose tool that easily tucks in a drawer, I see it more as a kitchen essential than a specialty item.
Overall Key Takeaways
- Keep a light touch. The best methods were the ones that handled the meat the least and didn’t overly compress the patties.
- Start with cold meat. It’s easier and less sticky to shape cold meat, but lightly moistened tools or fingers can help if your meat starts to warm up while you shape.
- Let them grill undisturbed. You can shape with all the care in the world, but if you fuss with the burgers too much while they grill or smash them and push all the juices out as they cook, they’ll end up tough and dry.
This post originally appeared on The Kitchn. See it there: I Tested 7 Methods for Shaping Burger Patties, and the Clear Winner Makes Them Perfectly Juicy