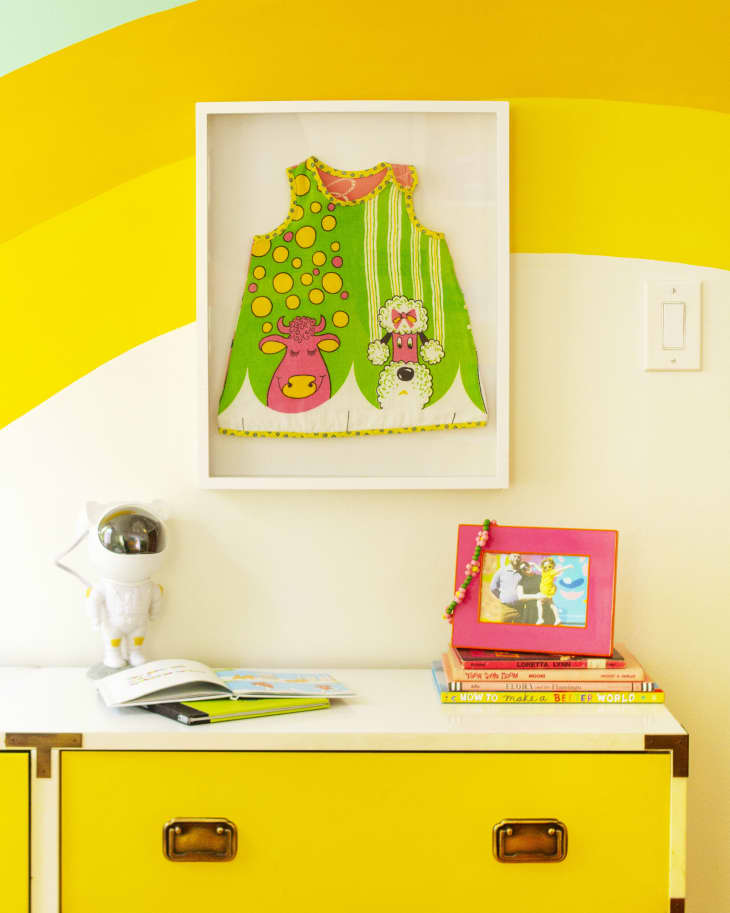
How to Frame an Heirloom Piece of Clothing

This piece was created for Cubby, our weekly newsletter for families at home. Want more? Sign up here for a weekly splash of fun and good ideas for families with kids. Join us over on Instagram for more!
Cubby: A Weekly Newsletter for Families at Home
Whether you need smart solutions or fresh ideas, our editors at Kitchn and Apartment Therapy are here with our best meal plans, organizing and design tips, toy recommendations, and more.
If “anything is art if an artist says it is” (Marcel Duchamp), then we are all artists and the handmade baby clothes we were given for our children are works of art and worthy of being hung on the walls of our home! Framed tiny pieces of clothing is such a fun way to add character to your home – and a great way to preserve memories. Professional framers can certainly do the job, but it’s more fun (and affordable!) to do it yourself. The process can be time consuming the first time around, but it’s easy once you get the hang of it!
Supplies
- Frame with at least 1” of depth, or any shadowbox
- 2 pieces of acid-free matboard (one large sheet cut in half usually works, but it depends on the size frame you choose)
- Scissors or X-Acto knife and cutting mat
- Large craft needle
- Fishing twine
- Pushpins
- Clothing item
- Tape
How to Frame a Keepsake Piece of Kids Clothing
Step 1: Begin by laundering and pressing your garment so that the side seams lay as flat as possible.
Step 2: Next, cut two pieces of mat board that fit perfectly to the size of your frame. One piece of matboard will be used for stability on the inside of the garment, and the other will be the backing board that you’ll attach the board inside the garment to.
Step 3: Lay the piece of clothing flat on one piece of matboard, then lightly trace around it allowing at least a 3/4” excess border from the edge of the garment. Set the garment aside and cut the matboard along the traced lines.
Step 4: Place the cut out mat board inside the garment. It should be snug, stretching the garment and showing a good fit, but you don’t want it so tight that the garment bows the matboard. The board may need to be trimmed up before it ever fits inside the garment; if so, shave a little away from the sides at a time until you get a snug fit. Once the board fits inside the garment, use a pencil to trace around any areas of exposed matboard, then take it back to the cutting mat and cut out those pieces.
Step 5: Once the interior matboard has been perfectly trimmed, remove it from the garment and center it on the backing board. Once you find the perfect position, carefully draw two dots on the interior mat board on the uppermost left and right side of the garment, as well as the bottom left and right sides. It’s important during this part of the process not to move either piece of mat board even the slightest bit.
Step 6: Once the holes are drawn, use a pushpin to press straight down through both pieces of mat board at the same time, without moving either board. Leave the pushpins in place until all of the holes have been poked through. When all the holes have been poked, remove the pushpins and use your craft needle to enlarge the holes so it will go through with ease during the stitching process. Next, place the interior board back inside the garment and position it over the holes in the backing board.
Step 7: String your craft needle with a small length of fishing twine (12” or so should do), then starting from the backside of the backing board, line up the holes and send the needle up through the back of the hole in the backing board, as well as the garment and interior board, then over to the second hole, and back down through the interior board and backing board, until you end up on the back side of the backing board. Grab both lengths of fishing twine and tie a triple knot, then secure the fishing twine in place with a piece of tape.
Continue around, stitching the interior board to the backing board using each set of pre punched holes. Once you’re finished securing the garment to the board, place it in the frame and proudly display your work of art on the wall for all to see!