
How to Make Your Own Fruit Roll-Ups
I don’t consider myself a #crunchymom, per se, but I do have some crunchy tendencies. While I’m ok with my kids enjoying occasional sugary treats, I want them to know what’s in their food and where it comes from so that they can make informed decisions as they grow into adulthood. As someone who loves candy, carbs of all kinds, and Diet Coke straight from the fountain, I try hard not to vilify foods or my children’s (or anyone’s for that matter) food choices.
But when my 7-year-old developed a daily Fruit Roll-Up / Fruit By the Foot habit at camp and started asking for them in her lunches, I had to come up with an alternative for her that wasn’t loaded with corn syrup and artificial colors. So, I did what any semi-crunchy mom would do: I started making my own.

How To Make Your Own Fruit Roll-Ups
The history of dried fruit and fruit leather stretches back for centuries, to long before modern refrigeration extended the shelf life of our produce. This preservation technique dehydrates the fruit, concentrating the flavor and prolonging the edibility of the fruit. And it could not be easier to do it.
Ingredients
1 pound strawberries, washed and stems removed
1 teaspoon lemon juice
Directions
Preheat oven to its lowest temperature. Line a baking sheet with parchment paper or a silicone baking sheet, and set aside.
Combine 1 pound strawberries and 1 teaspoon lemon juice in a blender, and blend on medium-high speed until completely smooth, about 3 minutes. Strain through a fine sieve if you want a totally smooth texture.
Pour strawberry puree on the prepared baking sheet, and smooth to an 1/8-inch thickness.
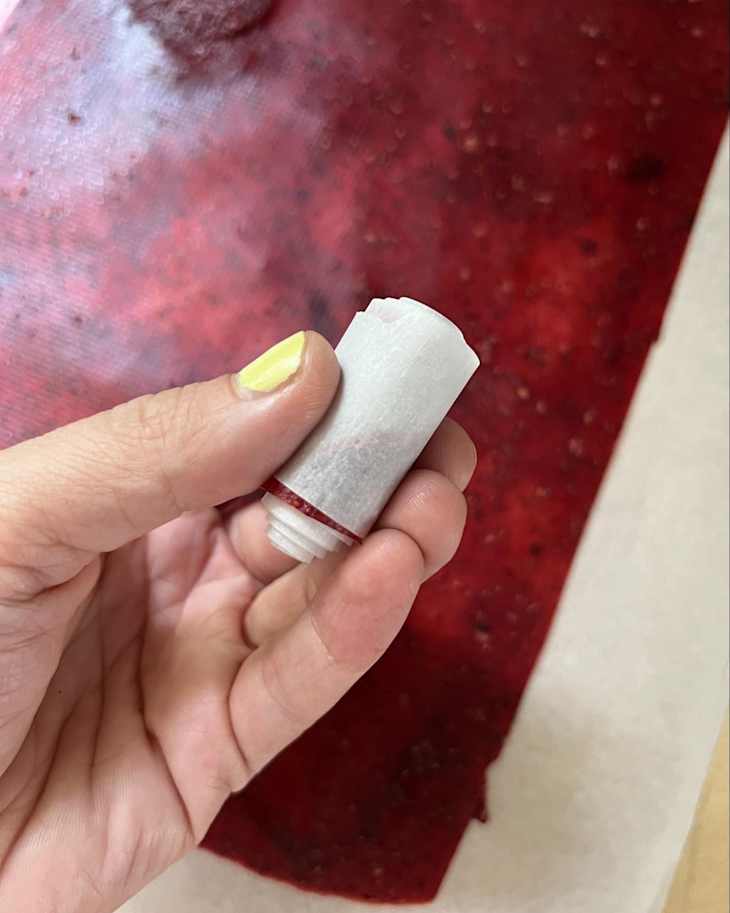
Place in the oven, and dehydrate for about three hours and up to five, checking every half hour after 1 1/2 hours. When completely dry and no longer sticky, remove the sheet tray, and allow the fruit leather to cool on the tray before removing to a cutting board and cutting into shapes (I use a pizza cutter).
Roll up shapes, and store in an airtight container (a zip-top bag works well for this) in the refrigerator for up to 1 month.


Tips For Making Fruit Leather
- Here is my number one tip: Don’t call it ‘fruit leather’ to your kids. It sounds boring! Use those copyrighted brand names with abandon — your kids are not going to slap you with a cease and desist.
- Use parchment paper or a reusable silicone baking sheet, not wax paper, which will melt in the oven.
- Avoid the temptation to add water to the blender with your fruit; it’ll just prolong and frustrate the process.
- Experiment with whatever mix of fruit you like, and adjust dehydrating times as needed.
- Don’t skip the lemon juice. It helps balance the sweetness and preserve the color of the fruit.
- If you have a convection setting on your oven, it will speed up the process. Adjust timing accordingly.
- Make two different purees of contrasting colors (like mango and strawberry) and then swirl them on the baking sheet for a cool tie-dye effect.