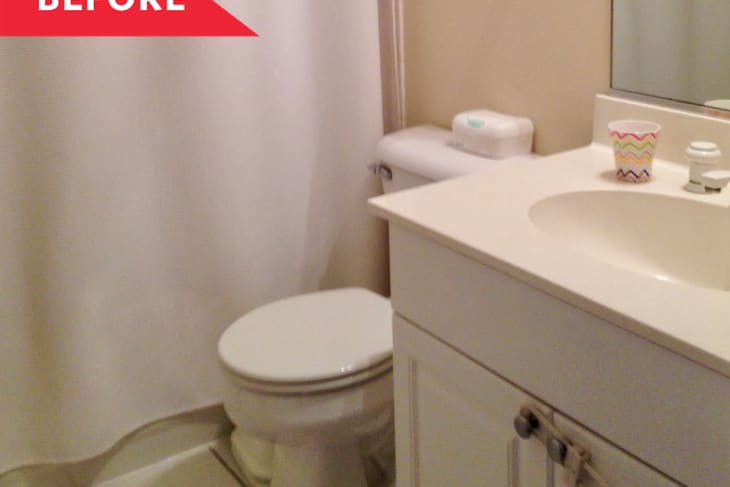
Before and After: A Plain ‘90s Family Bathroom Gets a No-Reno Transformation for $650

If you’re new to DIY, just the thought of tackling a renovation by yourself could become overwhelming. Not knowing which tools to use, how much money to budget, and a general fear of causing damage can be intimidating for people with little experience. But whether you’re looking for reversible renter-friendly renovations or trying to upgrade your bathroom on a budget, know that your dream DIY bathroom is totally achievable. Homeowner Cheryl Kennedy shows how it’s done with her recent bathroom remodel.
Cheryl’s home was built in 1998 and still has most of its original, builder-grade fixtures. That went for the bathroom, too, which had uninviting beige walls, off-white cabinets, and a dated light fixture.
When her family first moved in eight years ago, Cheryl made small upgrades like replacing the shower head, faucet, and toilet seat and adding a dimmer switch. These swaps improved the functionality of the bathroom, but it still looked more or less the same. Since she and her husband had their hands full with work and a young child, making further improvements wasn’t a priority. So for years, it was perfectly adequate — just plain and boring.
This bathroom is used primarily by Cheryl’s now nine-year-old daughter (along with guests), so Cheryl wanted to give it some personality. “I wanted the room to have a bold and whimsical feel suitable for a tween (and soon to be teen) girl, but not seem childish to our guests,” she says.
With no experience in wallpapering or cabinet painting, “I was daunted,” Cheryl says. Like many new DIYers, having extra time at home and no guests during the pandemic gave her the push she needed to tackle the cosmetic updates she’d been thinking about for years.
Cheryl studied DIY bloggers and YouTubers, then broke the project into four smaller categories: wallpapering, cabinet painting, building and staining the mirror frame, and installing accessories. Compartmentalizing this project made it much more manageable and less intimidating.
Cheryl started by applying wallpaper in a blue-and-white shibori pattern, which instantly gave the walls a boost. The pattern graphic pattern is cool enough for a teen but sophisticated enough for an adult — the perfect balance Cheryl was hoping to strike.
Next, Cheryl tackled the cabinet. To remain consistent with shades of blue and grey, the cabinet color (Benjamin Moore’s Winter Lake) is a soft mix of the two. Clear knobs add a touch of glamour while keeping focus on that gorgeous paint color.
While Cheryl kept the existing mirror in place, she did some DIY magic to make it look brand new. Wood boards, given a weathered look with white wash wood stain, make the perfect frame; all Cheryl needed to do was cut them to size and glue them to the mirror.
The light fixture stayed, too — rather than installing a new one, Cheryl simply covered it with a decorative shade she got on Etsy for a fraction of the cost of buying a totally new light.
Finally, Cheryl added the rest of the decorative elements that make this bathroom feel super homey: a shower curtain, shelves, and art.
Overall, Cheryl was able to do most of this bathroom herself (with an occasional assist from her husband) for just $650 total.
“If you’re thinking about updating a space that’s looking sad, be brave and go for it!” Cheryl says. DIYing this bathroom upgrade helped her avoid a costly, and disruptive, pro renovation. While mistakes along the way are inevitable for first-time DIYers, Cheryl says they’re no biggie: “You can fix them, learn from them, and still love the final result.”
Inspired? Submit your own project here.
This post originally ran on Apartment Therapy. See it there: Before and After: A Plain ‘90s Bathroom Gets a No-Reno Transformation for $650