
This Simple Playdough Recipe Lets You Make and Bake Playdough Sculptures

My 2-year-old son loves arts and crafts; the more tactile, the better. So it should come as no surprise that playdough is his favorite. His interest with the modeling material and fervor for making unique sculptures is a treat to watch. The only con is keeping a steady supply of playdough on hand, a costly endeavor — until I decided to create my own playdough recipe.
Why I Decided to Make My Own Playdough
The problem with store-bought playdough is that the less expensive brands dry out too quickly even when sealed, while the expensive brands too often end up hidden in other toys or smashed into the carpet. (Explaining to a toddler “the how” and “the why” of putting playdough back into its container is a hard sell.)
Additionally, I quickly learned how attached my son was to his sculptures when I would cram his creations back into their containers, witnessing classic toddler meltdowns. I’d heard about baking playdough sculptures to make permanent art, but all I saw were more dollar signs knowing the playdough I purchased would continue to be a one-and-done.

What Makes This the Best Playdough Recipe
Not wanting to discourage my son’s creativity or decrease his sensory and tactical playtime, I had to come up with a creative solution. Turning to my former pastry chef career, I started making homemade playdough. Here’s what makes it superior to the store-bought stuff:
- It’s cheaper. The supplies needed to make playdough from scratch are less expensive than purchasing store-bought dough.
- It’s fast and portionable. It takes less than 15 minutes to make a large batch of dough, which is easy to portion to monitor how much or how little playdough my son plays with.
- It’s safe to bake. Baking homemade playdough seemed safer than using chemically processed sculpting material in my oven.
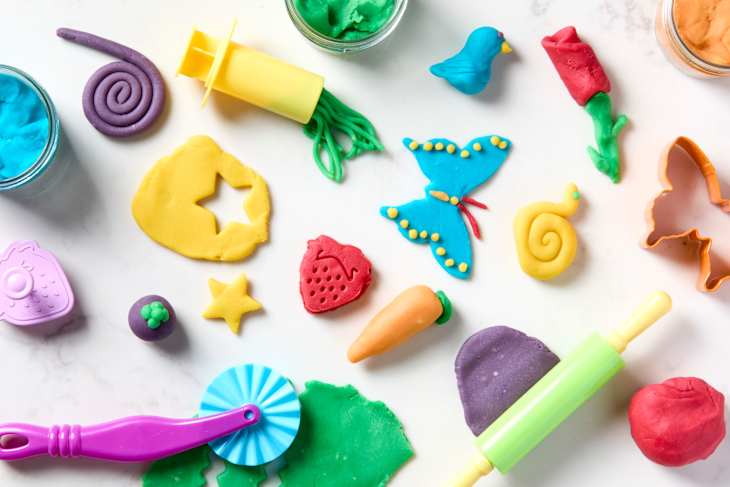
- You can choose your own colors. Gel paste dyes create vividly-hued playdough. And you don’t need a lot!

Why You Should Make Your Own Playdough
What initially started as a way to save money on pricey store-bought playdough has evolved into something more. Making and baking playdough has helped encourage his creative side, teach him how to be responsible for his things, decide what he wants to keep or not, and introduce the concept of a homemade gift being more valuable than something store-bought. While my son still loves keeping his sculptures, baking his art has become a new activity for one-of-a-kind home decor and gifts for holidays, birthdays, and just-because occasions.

How to Make Playdough
Prep time 5 minutes
Cook time 8 minutes
Makes 3 1/2 pounds
Nutritional Info
Ingredients
- 4 cups
all-purpose flour
- 2 cups
salt
- 2 tablespoons
cream of tartar
- 4 cups
water
- 2 tablespoons
vegetable oil
Food coloring
Instructions
Line a sheet pan with wax paper or silicone mat; set aside.
In a large, heavy-bottom pot combine all the ingredients but food coloring.
Place the pot on the stove over medium heat. Using a wooden spoon, stir the mixture continuously making sure to scrape down the sides and bottom to prevent burning.
The mixture will start to thicken in places, continue stirring until mixture comes together (stirring will become difficult). Once mixture is together but uncooked portions are still visible, start rolling the dough with the spoon to continue cooking.
When the dough is evenly cooked with no visible wet spots, remove from the pot and place on the prepared sheet pan. Using the back of the spoon, flatten the dough and let cool slightly; about 5 to 10 minutes.
Once dough is cooled enough to touch, add 5 to 10 drops of food coloring. Wearing disposable gloves, knead food coloring into dough on the sheet pan, until dough is evenly colored. Flatten dough with your hands and let cool completely.
Store playdough in an airtight container or a sealable plastic bag until ready to use.
Recipe Notes
Once dough is colored and cooled, roll dough out about 1/2-inch thick. Using a fun-shaped cookie cutter, portion dough. Combine scraps, roll and repeat until dough is completely portioned. Store portined dough layered between parchment paper to prevent dough sticking together in an airtight container.
Bake playdough sculptures in a 250°F oven for 20 to 30 minutes or until the exterior is dry and hard. Baking time varies depending on the thickness of the sculpture. Playdough will not bake all the way through. Once the exterior is baked and sealed, the interior will dry and harden over time.
How to Store Homemade Playdough
When your playdough has cooled, portion it out and store it in an airtight container or a sealable plastic bag until it’s ready to use. When stored properly, it can stay soft for up to 6 months!
How to Bake Homemade Playdough
For playdough sculptures that are worth preserving (or gifting!), bake in a 250°F oven for 20 to 30 minutes or until the exterior is dry and hard. Baking time will vary depending on the thickness of the sculpture.
Playdough will not bake all the way through in the oven, but once the exterior is baked and sealed, the interior will dry and harden over time.